I have been taking yoga teacher training through the studio I go to and on one of the weekend sessions a fellow student brought this fabulous loaf of bread that we all consumed really fast. The crust was so crunchy, I immediately wanted to learn how to make it. My friend shared a recipe that she modified over the years from multiple different blogs to suit her needs. So the credit for this bread goes to Monica the Yogi 🙂
More recently I have been making it frequently. It’s a very simple and pretty quick no mess recipe to please your guests. It tastes like store bought sourdough bread to me. But of course the real sourdough will be even better – a post on that is coming up shortly. I have just begun my starter, so will post on that in a week or two.
Last week I went for a coffee with my girlfriend Aakriti and we talked about all sorts of our health and wellness goals for the year and somehow it came up that both of us had a goal of learning how to make sourdough bread in 2024. I shared my strategy of starting with something simpler, just to get used to making bread and told her about this amazing recipe my yoga studio group really enjoyed that I have adopted. We both got really excited about making this bread again and I promised to post this asap. So here it is, in as much simplified form as possible.
You will need:
Equipment:
Water thermometer or a kettle with thermometer
Measuring cups and spoons
Large bowl
Dutch oven
Parchment paper
Wooden spatula
Silicone spatula
Kitchen towel/tea towel
Ingredients:
1.5 cups Water at 100F
2.25 tsp yeast (Monica taught me to use Fleischmann’s Traditional one from Walmart)
½ tbsp salt
3.25 cups all purpose flour (and a little more to sprinkle on parchment paper in the end)
Method:
In a large bowl whisk together warm water, salt and east.
Add flour and mix well with wooden spoon or spatula. Can scrape the dough off it with silicone spatula.
Coved the bowl with a tea towel and let rise in a warm part of the house for 2 hours. I have also done it overnight.
Heat the oven to 232 C. or 450F with the dutch oven inside. Once the stove oven reaches the temperature, leave the dutch oven inside for another 20 mins.
On a roughly square piece of parchment paper dust a bit of flour (I put it all over but most tutorials dust lower part of it, or the one closer to you).
Transfer the dough onto the paper (if you put it in the lower part of paper on the flour, you can flip it so the dough ends up in the middle part with the floured side up).
If you like, you can make a design or just a cross cut on the surface with a blade or very sharp knife ( I get busy sometimes and skip this when mass cooking a feast – it still turns out pretty good).
Gently transfer the paper with the bread into the dutch oven by holding all the ends of the paper. Be very careful because the dutch oven is very very hot! I take it out, put on a pad, and transfer the bread into it instead of trying to do it inside the stove oven.
Put the lid on and leave in the oven for 35 mins.
Take the lid off and leave the bread in the oven for another 10 mins.
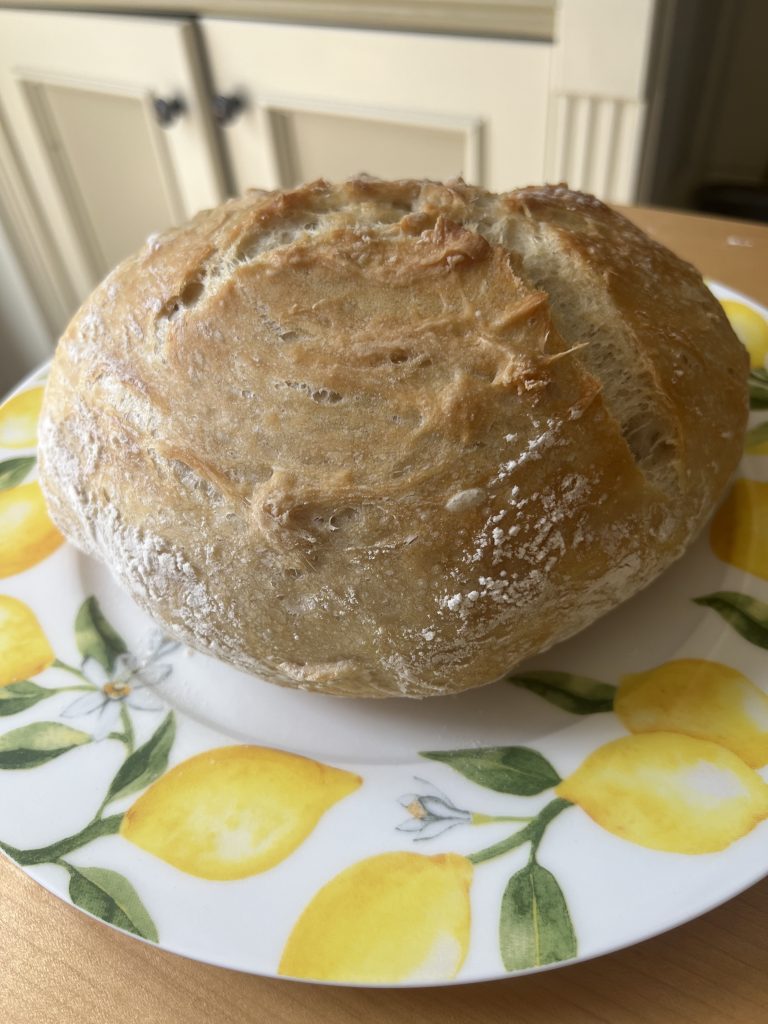
Take the dutch oven out – use good mittens, it’s very hot! Take out the bread and let it cool a little on a rack (if you put it on a plate it will produce some condensate on the bottom and might get wet/soggy – you want a perfect crust so don’t skip this step).
In about 10 mins it’s ready to be consumed!
So this whole process can take you under 3 hours and honestly the prep time is super minimal, maybe 15 mins total of your time. I love this simple recipe when I am cooking other stuff and can just start the bread first, then cook my other dishes, and by the time everything is done, the bread is ready too!
This is a very beginner friendly bread for someone who only baked bread machine breads before. The loaf size is not huge which I like. It can be consumed in one night by a big group or I often will share the half with guests to take home which is always appreciated. My next step is sourdough bread and I will report on it soon so stay tuned.
Enjoy! Let me know if you came up with any modifications, tips or tricks.
To help other women live a joyful, peaceful life and achieve their fullest potential.
To share the importance of self-care, self-compassion and kindness.
My Vision
To promote healthy lifestyle and mental wellbeing among women who hustle.